Vue.jsの始め方#4(html/css/js/jQueryがある程度わかる方向け)
前回の記事はこちら
Vue.jsの始め方#3(html/css/js/jQueryがある程度わかる方向け)
双方向データバインディング v-model
双方向データバインディングでは
vue.jsとhtmlが双方向に同期します。
dataオブジェクトの値変更→テンプレートの値変更
テンプレートの値変更→dataオブジェクトの値変更
サンプルコードを書いてみます。
index/html
<divid="app"><p><inputtype="text"v-model="message"></p><p><inputtype="text"v-model="message"></p><pre>{{ $data }}</pre><!-デバッグ用--></div><script src ="https://cdn.jsdelivr.net/npm/vue@2.5.16/dist/vue.js
"></script>
index.js
varapp=newVue({el:'#app',data:{message:'Hello Vue.js!'}})実行結果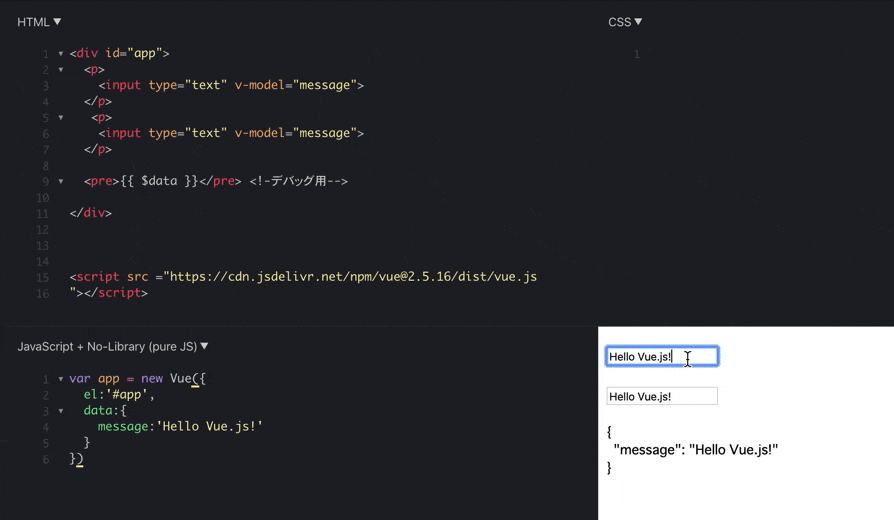
上のinputタグで中身を書き換えると
vue.jsのdataオブジェクトの中身が書き換わり
下のinputタグと同期するという流れです。
vue.jsのdataオブジェクトを書き換えると
両方のinputタグの中身が同期して書き換わります。
コンポーネントとは
コンポーネントはページを構成するUI部品です。
よく使う機能をコンポーネント化することで
コードの可読性が良くなります。
helloと表示するコンポーネントを作成して
3回繰り返して表示してみましょう。
index/html
<divid="app"><hello-component></hello-component><hello-component></hello-component><hello-component></hello-component></div><script src ="https://cdn.jsdelivr.net/npm/vue@2.5.16/dist/vue.js
"></script>
index.js
Vue.component('hello-component',{template:'<p>hello</p>'})varapp=newVue({el:'#app'})実行結果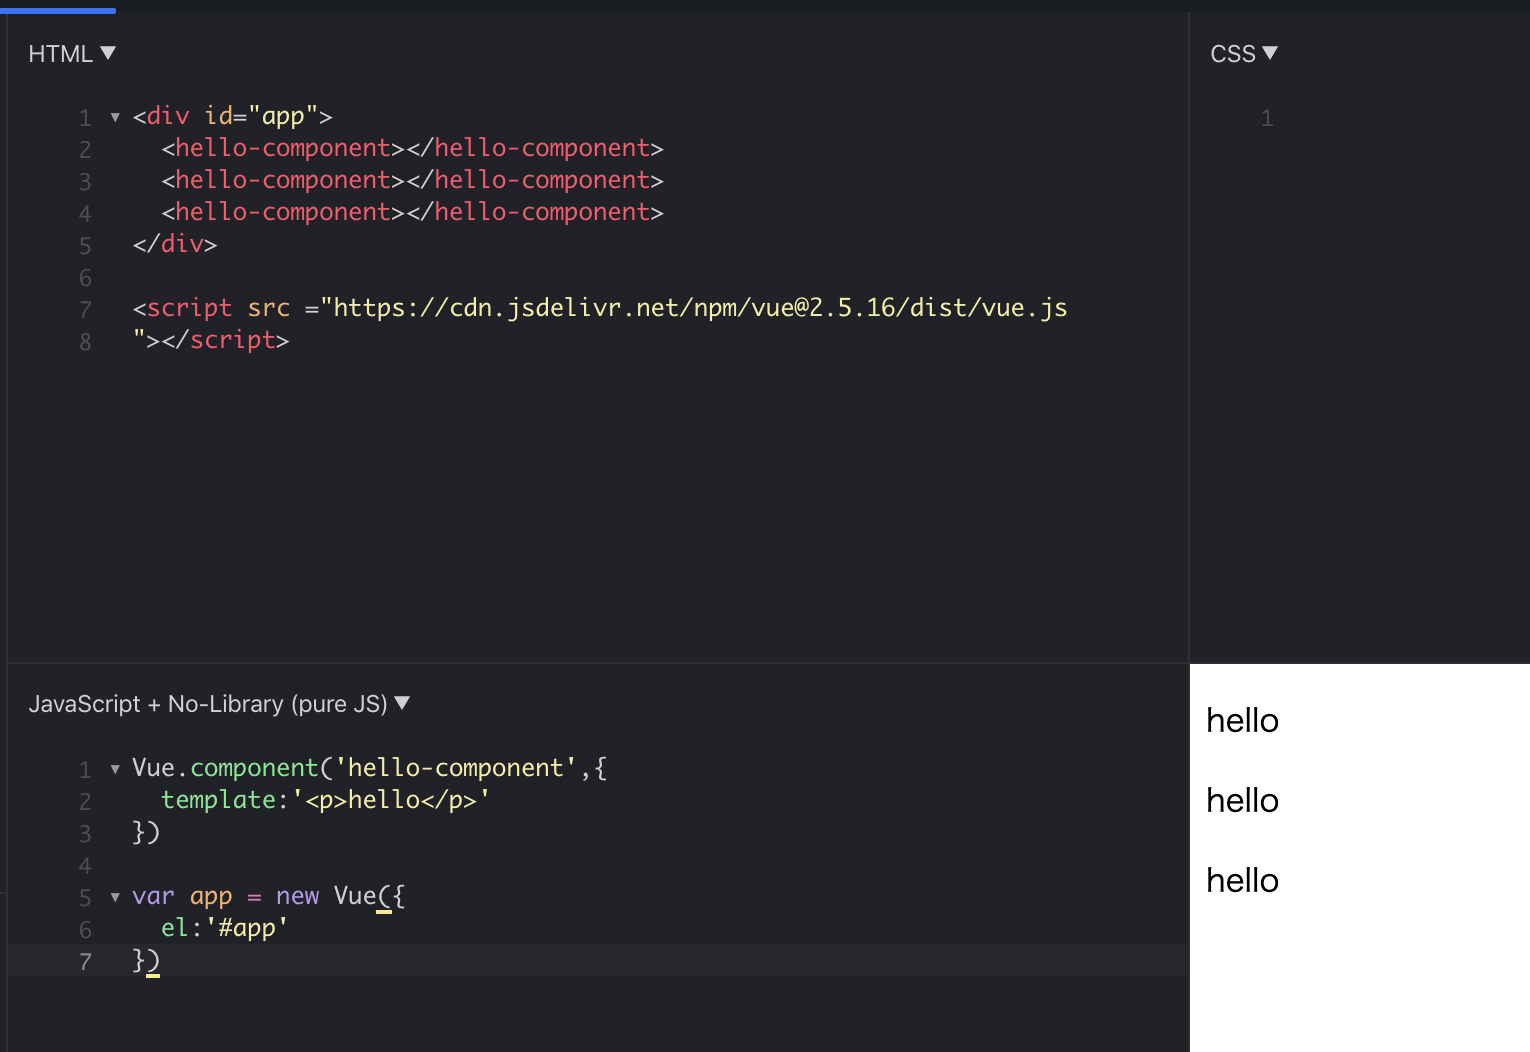
コンポーネントはvueインスタンス作成よりも上に記述します。
ここまでで基本のディレクティブは終了です。
次回はこれまでの内容を利用してtodoアプリを作成します。